|
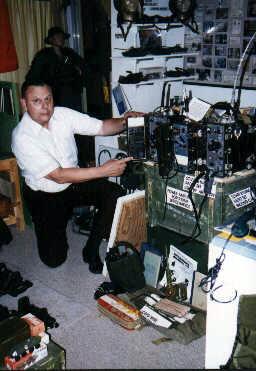
Along with the collecting of military radios is the collecting of the accessories related to these radios. Headsets, keys antennas and such present no problem but radio batteries do. Some years back I bought some recent issue radio batteries for WW II vintage Radios. I put them in the radios and hoped that they would "die" gracefully as some one put it.
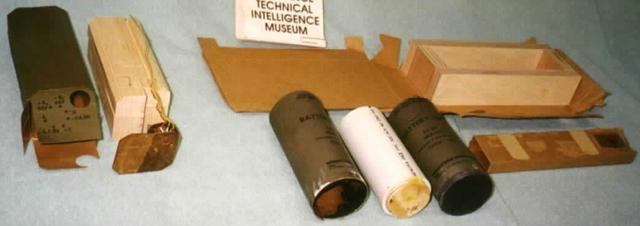
Recently I looked at them and to my dismay, they were beginning to corrode and eat through the outer casing and paper covers. This is a prime problem with the zinc cased A cells used for filament supply. What could I do to save these relics of the past? I first tackled the BA 23 battery which is a 1 1/2 volt battery sometimes known as a telephone battery.
 Batteries Showing Corrosion |
|
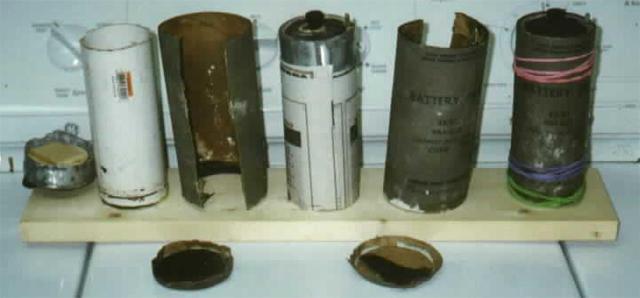
I soaked them in water which loosened up the bottom paper
cover and removed it. Then I carefully sliced down the seam in the outer wrapper and
removed it. I then cut off the top of the zinc casing with the negative terminal still
intact. A segment of 2 inch PVC pipe was cut to approximately 6 inches. Wooden plugs were
then cut to fit the inside of the pipe. In one of these plugs a hole was drilled and a
brass screw inserted and held in place with a small block of wood. This would serve as the
Positive terminal as the screw on the carbon rod is not long enough. This plug was painted
black as in some cases the paper top cover gets destroyed in the dismantling process. The
wooden plugs were then glued in place. I used a product called RC 56 which is designed to
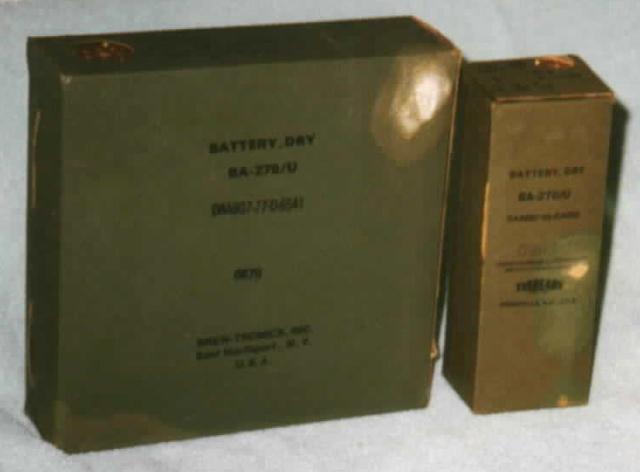
glue anything to anything. It works well when gluing plastic parts to wooden parts. Several layers of newspaper were then cut and wrapped around the PVC pipe to bring it up to the diameter of the zinc casing and were glued in place with Elmers white Glue. Once this was glued in place, the outer cover was glued on and the bottom cover was glued in place, again with Elmers white glue. The screw on terminals were then put back on and we have a corrosion proof replacement, which makes an excellent display item. There is room inside the PVC pipe for the installation of some D Cells for those who want the battery to provide power. The next batteries that I tackled were the BA 48, the BA 279/U and the BA 270/U. The BA 48 provided power for the receiver portion of the SCR 694 and also provided power for the WW II O.S.S. receiver and transmitter, the SSTR 5. The latter two batteries power the AN/PRC 6 and AN/PRC 10 radios. These provide 1.5 volts for tube filaments and B + voltages ranging from 67 1/2, to 90 and to 135 volts. If left alone for several years corrosion results and they too begin to leak and destroy the outer case. These batteries are made up of four D type cells and numerous smaller cells for the B + voltages. Once again, it is the A cells which are zinc-carbon batteries which corrode. I opened up the outer cardboard case and removed the batteries from the case. There is usually some black gummy stuff which oozes and makes removal difficult. I had to open all the seams and pry the outer cover off. Then I glued the outer cover back together part way. I then made a wooden frame which would fill up the inside of the the case. There were several styles of top sections but having rebuilt three of them, I found two that were straight forward and only needed a rectangular frame. The third required a spacer on top. The original socket is mounted to a fibre board strip and there are four leads to the battery packs. These should be cut off with the leads as long as possible. A hole was then drilled in the top to allow the socket a place to rest. Smaller holes were drilled for the connecting wires. The leads from the original socket were then fed through the smaller holes. The fibre board strip was then fastened to the wooden frame. Staples or glue can be used. Then the entire frame was then re inserted in the case and the case glued back together. This is adequate for a display item to sit on the shelf. For those who must have a working battery, there is plenty of room inside for whatever you choose to put in there. I found that it will hold three Radio Shack D cell holders costing 99 cents each. I wove the lead in wires through the holes in the holders which serves to hold them together. These leads were then joined and soldered to the lead in wires from the socket connection. Joints were covered with heat shrink tubing. A small wooden strip was then glued in to hold them in place and keep them from shifting around inside. This serves as the filament supply. While it will not last as long as the original battery pack, it will provide a reasonable amount of usage. The B supply for the BA 48 was made up from ten 9 volt transistor batteries. The BA 279/U requires fifteen of the 9 volt cells. The battery snaps were bought from Radio Shack in packs of 5 each. They were soldered together and then soldered to the socket lead in wires. I left the leads at their full length for ease in handling. I would recommend that they be made shorter when you try this. The ten 9 volt batteries are held in a pack by several wraps of electrical tape. The connection of the clip leads were covered with heat shrink tubing. This pack is placed at the other end of the framework and held in place by small strips of wood, keeping in mind that you will have to replace them. Since the B batteries will last longer than the A cells, rechargeable nicads can be used for the A battery pack and can be recharged with out opening the case. The entire assembly is then slid back into the outer card stock casing. In this case, you will want to be able to gain access to them so the bottom cover was held in place by two straps of sticky Velcro obtainable from most craft stores. A more sophisticated system can be made using an inverter power supply developed by Dennis Starks for this purpose. In this case, the frame is made about 1/4 inch too thin and a wooden side panel is glued in place. this serves as a place to mount the circuit boards and keep then from bumping into each other and shorting out, etc. This system was designed to operate from re-chargeable gel cells. While it is a bit more difficult to construct, in the long run it will save on the cost of replacing the 9 Volt transistor batteries. The BA 270/U presents the most difficult challenge as the unit is not a square but has sloping sides. It also requires a C voltage of 4.5 volts. A wooden bottom was made , a top panel with the sides cut to the slope of the original battery and two end panels were cut and glued together. A hole was cut in the end panel for the power socket. The interior of this battery pack has much less space than the others. In this one the space allows for the B battery pack but the A supply was C cells. C Cell holders are available from Radio Shack. |
 BA-279 and BA-23 Batteries |
||
 BA-23 Battery from start to finish |
||
 BA-48 Battery |
||
 BA-48 Battery |
||
 BA-48 Battery & New Parts |
||
 BA-279 Battery Dismantled |
||
 BA-279 Battery with Wooden Blocks |
||
 BA-48 with Batteries in Wooden Frame |
Again a Radio Shack battery holder for four pen light cells was obtained and partially re wired to provide a series connection allowing for 4.5 volts for the C supply. There is an Ever-ready 67 1/2 volt battery still on the market which is designed for electronic equipment. It has snap fasteners which are the same as the 9 volt transistor snaps. Two of these take up much less room than an equivalent supply of 9 volt batteries. Antique Electronic Supply also sells 45 volt batteries which take up much less room but naturally they cost more. For those who only want it for a display item, a solid wooden block can be cut to fit. I used two pieces of lumber, as shown in the picture and cut out a slot for the power socket.
While power supplies can be made to fit the sets using aluminium boxes and other containers, nothing looks as good as the original battery. At least in this way you have enhanced your display and preserved a part of the radio's history that is rapidly disappearing. The last photograph shows the completed display.
 BA-48 Back Side with Batteries |
|
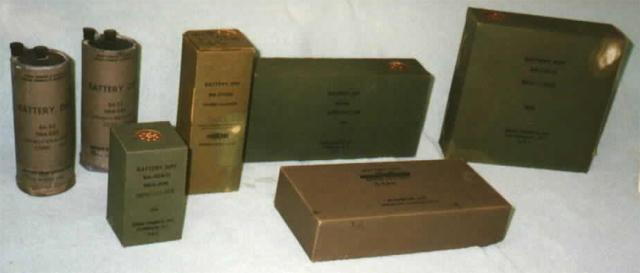 Completed Battery Display |
Visitors to this page since 14 October 2000
Back to Your Articles Index Page
Army Radio Sales Co. Home Page